.svg)


With MFA Phase 1, users were able to set up Multi-Factor Smart Accounts for the first time on Stokenet and use Regular Access factors to sign transactions.
However, once you configured your security structure, you couldn’t change it, even if you wanted to replace a factor or if you lost access to one.
MFA Phase 2 solves this.
You can now safely update your security structure anytime by using the recovery process with Phase 2 of MFA testing on Stokenet.
How Updating Your Security Structure Works
To change your security configuration, you need to present factors from any 2 of the 3 roles:
- Regular Access
- Recovery Access
- Confirmation Access
One role starts the update, and another role confirms it.
You can start the update using either Regular or Recovery access, and you can confirm it with any other role.
This gives flexibility while still keeping your account secure.
Timed Recovery: A Safety Net
The Recovery role has one additional power: If you’ve lost access to the other roles, it can start a timed recovery.
During timed recovery, no second role is required immediately. Instead, after a predefined delay (set when you configured your account), any role can confirm the recovery and update your security structure.
This ensures that even if multiple devices or factors are lost, you’re never locked out permanently.
More in depth details can be found here.
How It Works in the Wallet
When you update your security configuration for an account or persona:
- The Radix Wallet will show you a transaction to sign.
- You’ll be asked to provide the signatures required by your current security structure.
- If you’ve lost a factor, the Wallet will automatically guide you through skipping it and using the appropriate recovery flow.
If you sign only with your Recovery role, the Wallet will show a screen explaining that you’re about to start a timed recovery, and what that means.
Once the transaction is submitted:
- If you provided two roles → The update applies immediately.
- If only Recovery was used → The account enters timed recovery.
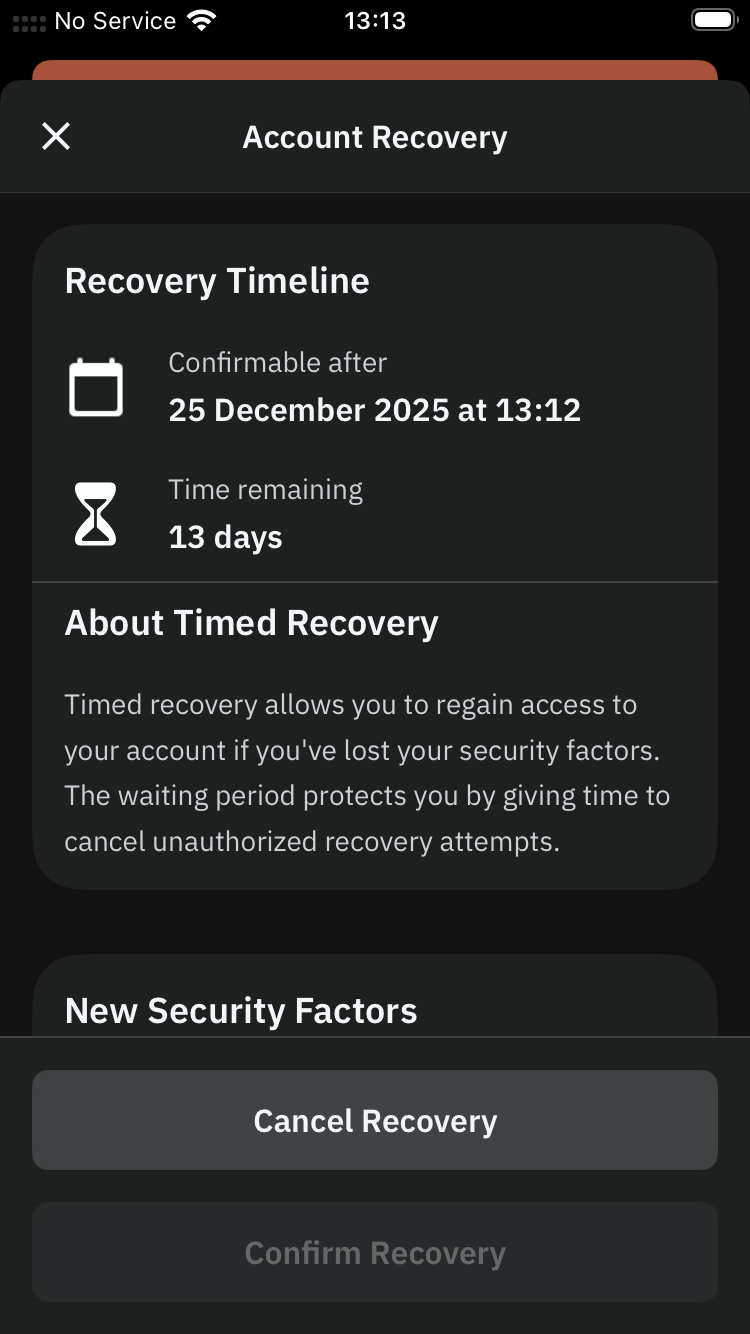
Understanding Timed Recovery
While an account is in timed recovery:
- You’ll see a clear banner indicating the recovery state.
- Tapping it will show a screen with:
- The recovery details
- The time remaining
- Options to stop the recovery
- Or confirm it once the countdown has finished
After the recovery time has fully elapsed, you can sign a transaction to confirm the new security structure. Once confirmed, your updated factors become active, and you can use them normally.
If you regain your lost factors…
You can simply stop the timed recovery and make any changes using the normal (immediate) update process.
Updating your Security Shield in Radix Wallet
Before you start:
Make sure your wallet is connected to Stokenet (the Radix public test network) and ensure you have already setup a Security Shield on your account or persona.
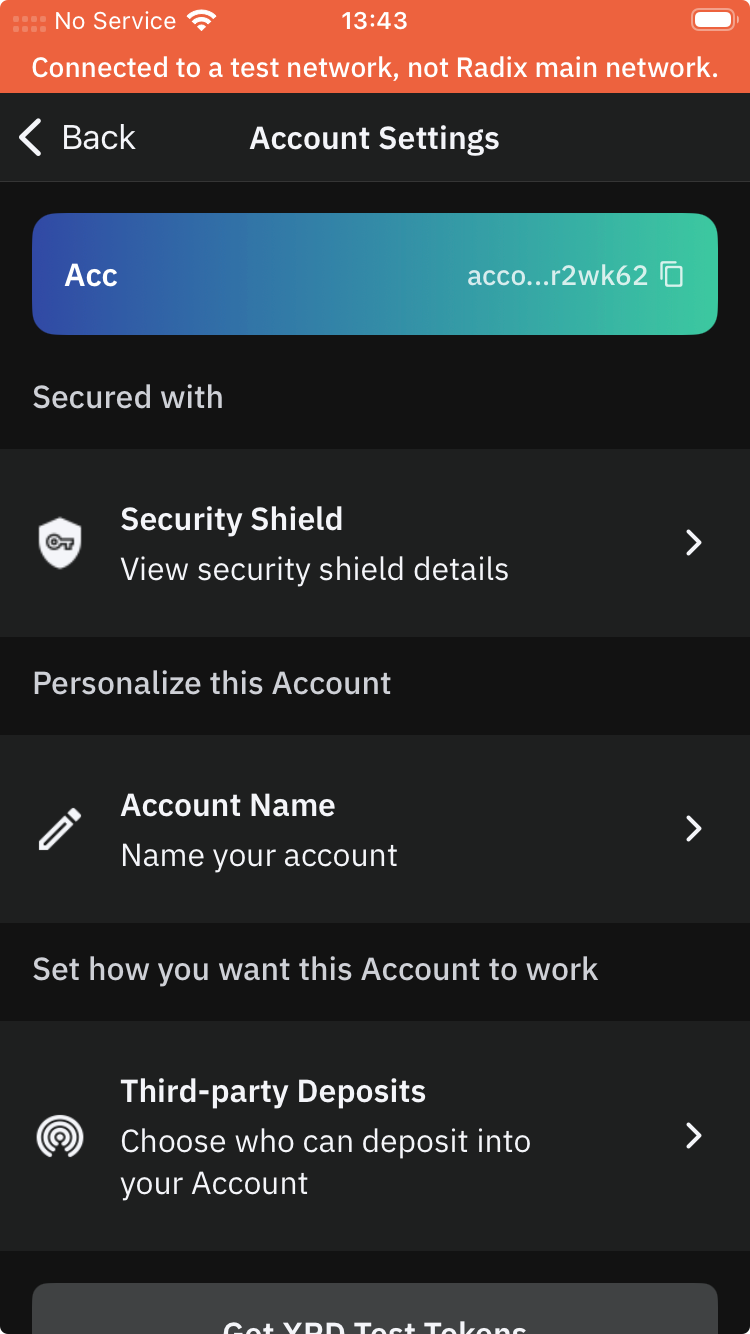
Step 1. Open the security shield for your Account or Persona
- Open Account Settings.
- Tap on Security Shield.
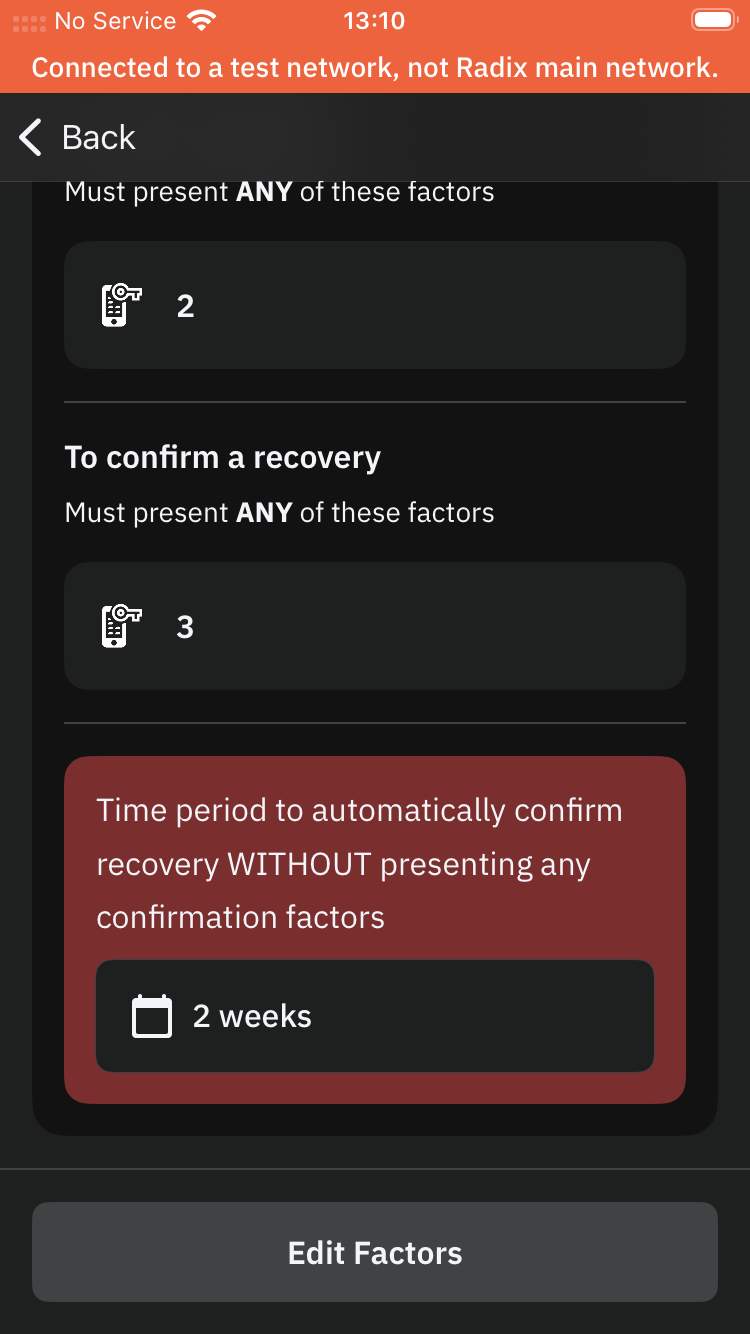
Step 2. Start Editing factors
- Tap on Edit Factors button
- Proceed with editing the factors and confirm the new structure
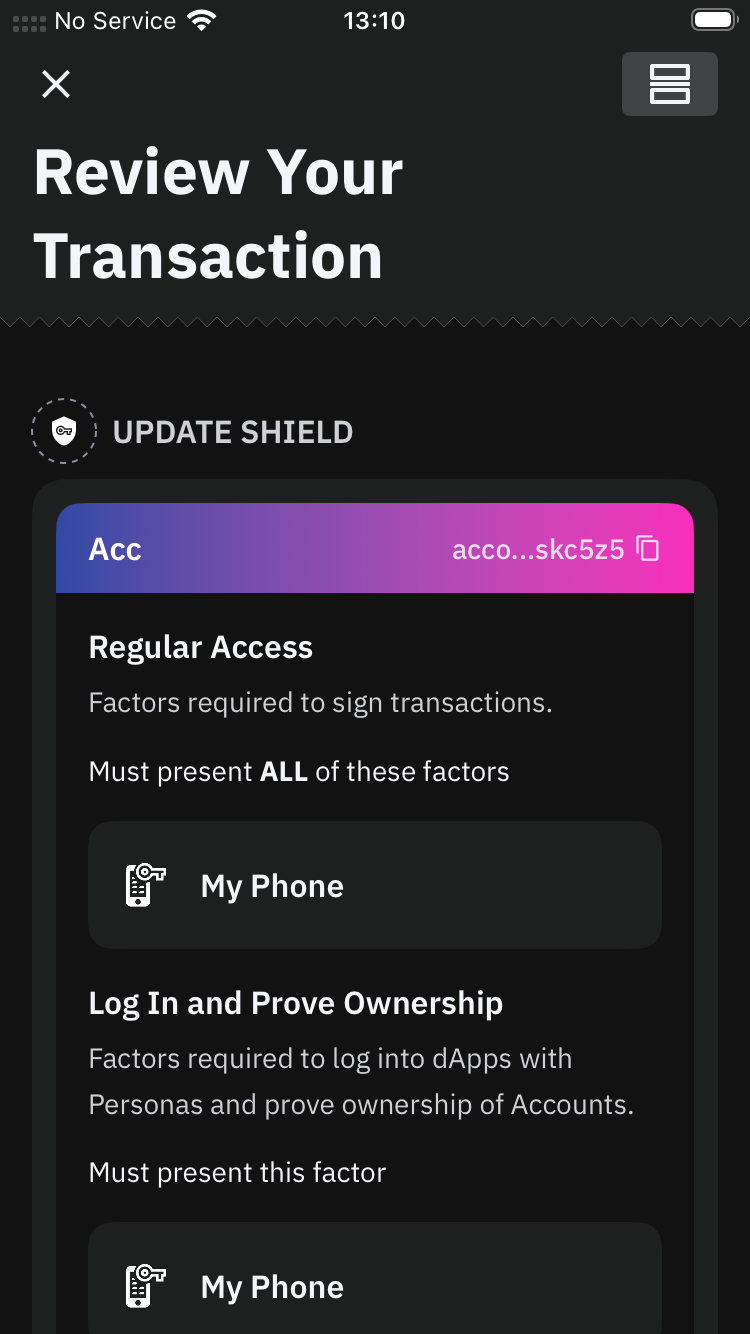
Step 3.1. Review and sign the transaction
- Review and sign the transaction. The Wallet will ask you for the necessary factor to be used for signing.
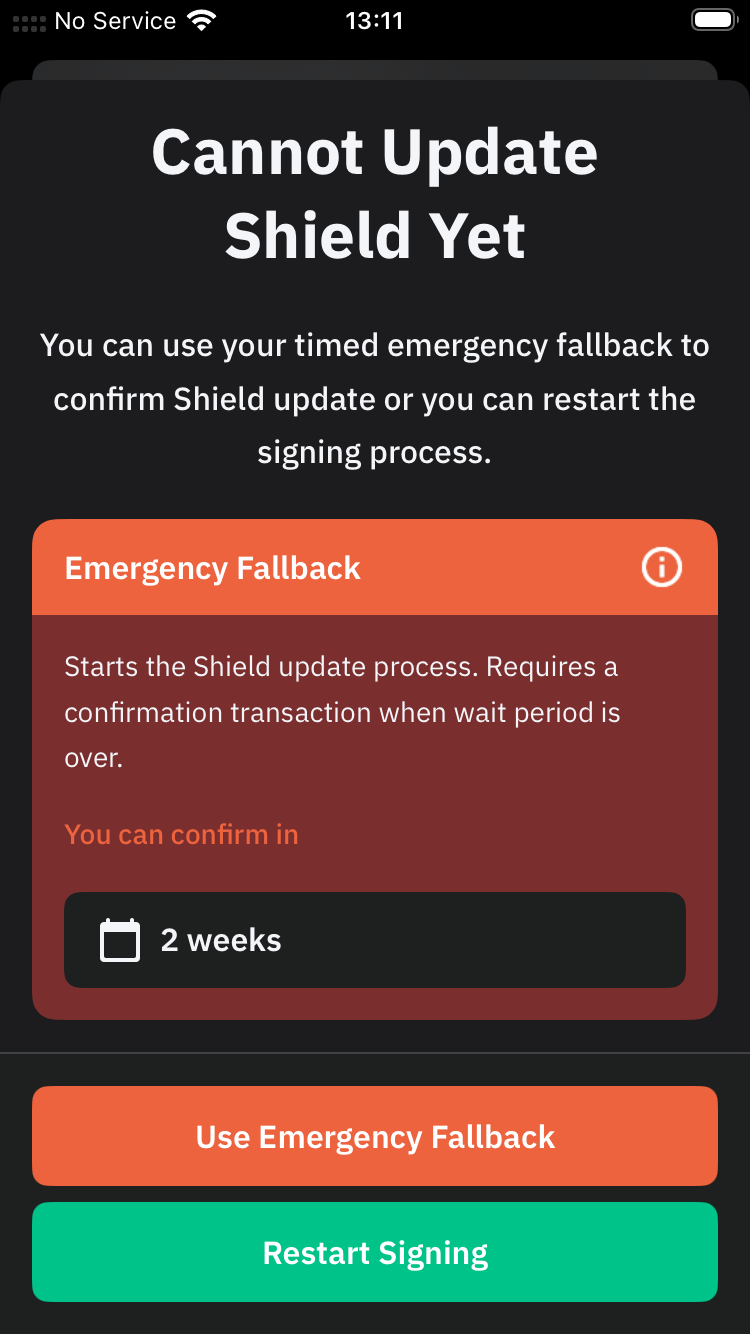
Step 3.2. Accept an Emergency Fallback if needed
- If you do present only Start Recovery factors, you will be presented with the option to use Emergency Fallback, starting a timed recovery.
Step 4.1. Emergency Fallback status
- After a timed recovery is started the appropriate status will be displayed
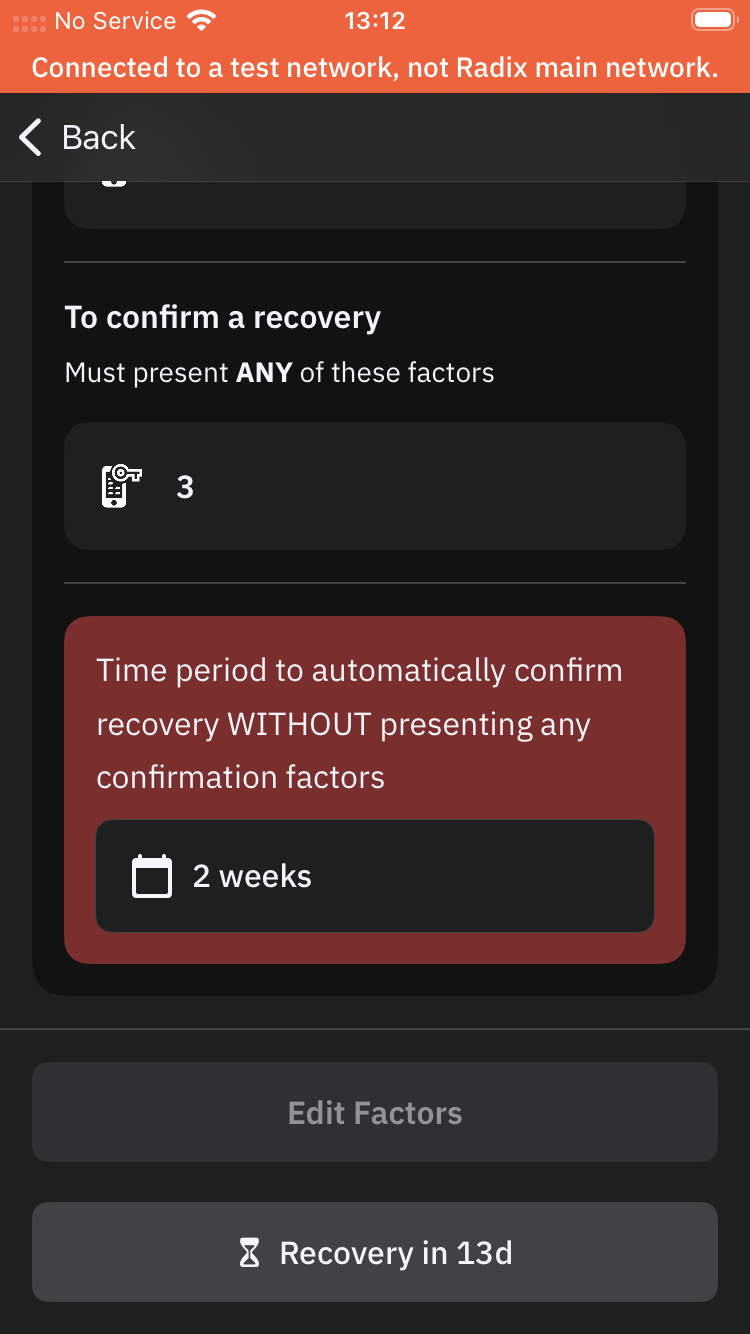
Step 4.2. Managing Emergency Fallback
- Tapping the Recovery status button, will reveal the Account recovery screen, where you will get more information about the recovery, as well the ability to Cancel or Confirm it.