.svg)


The roll-out of Multi‑Factor Smart Accounts in the Radix Wallet was announced last week, and today Phase 1 of the rollout is live on Stokenet. If you missed it, you can read the announcement to see how MFA will be integrated into the Radix Wallet here.
What is MFA
Multi‑Factor Smart Accounts (MFA) bring built‑in, on‑chain account protection & controls to the Radix Wallet. Instead of relying on a single seed phrase or hardware wallet to sign transactions and recover your accounts, you can secure your account with a Security Shield (name still TBC), a rule set of multiple factors. These can include your phone, Ledger, Arculus Card, an off‑device mnemonic, or even another trusted person.
MFA vs Account Abstraction
The main benefit of MFA on Radix is that unlike other models where a single factor is “abstracted” away from the user, on Radix the Access Controller removes any single point of failure from the account. This network level MFA gives users:
- Flexibility: Choose the combinations of devices or people you trust.
- Clarity: Your wallet clearly shows which factors secure your account.
- Control: Signing transactions or logging into dApps now respects your Security Shield rules.
Radix is the only Layer 1s putting this level of native, customizable account security directly on chain. If you want to learn more about the differences between Account Abstraction and true, native MFA on Radix, this blog is for you!
Phase 1 of MFA Rollout in the Radix Wallet
With Phase 1 of the MFA Rollout on Stokenet, you can:
- Create a Security Shield.
- Apply it to your account or persona by submitting a transaction.
- See your shield configuration directly in your wallet.
- Sign transactions or log into dApps using your Security Shield rules.
During this phase, the Radix Wallet team wants your feedback:
- Does the setup feel natural?
- Does signing behave exactly how you’d expect?
- Does the term “Security Shield” make sense, or should it be clearer?
How the Security Shield Protects You
When you first set up a Web3 wallet, you usually have one seed phrase. That seed phrase alone controls access to your account. If someone steals it, they effectively own your assets.
With the Security Shield in Radix Wallet, you can choose to protect your account with multiple factors instead of just one.
How it works
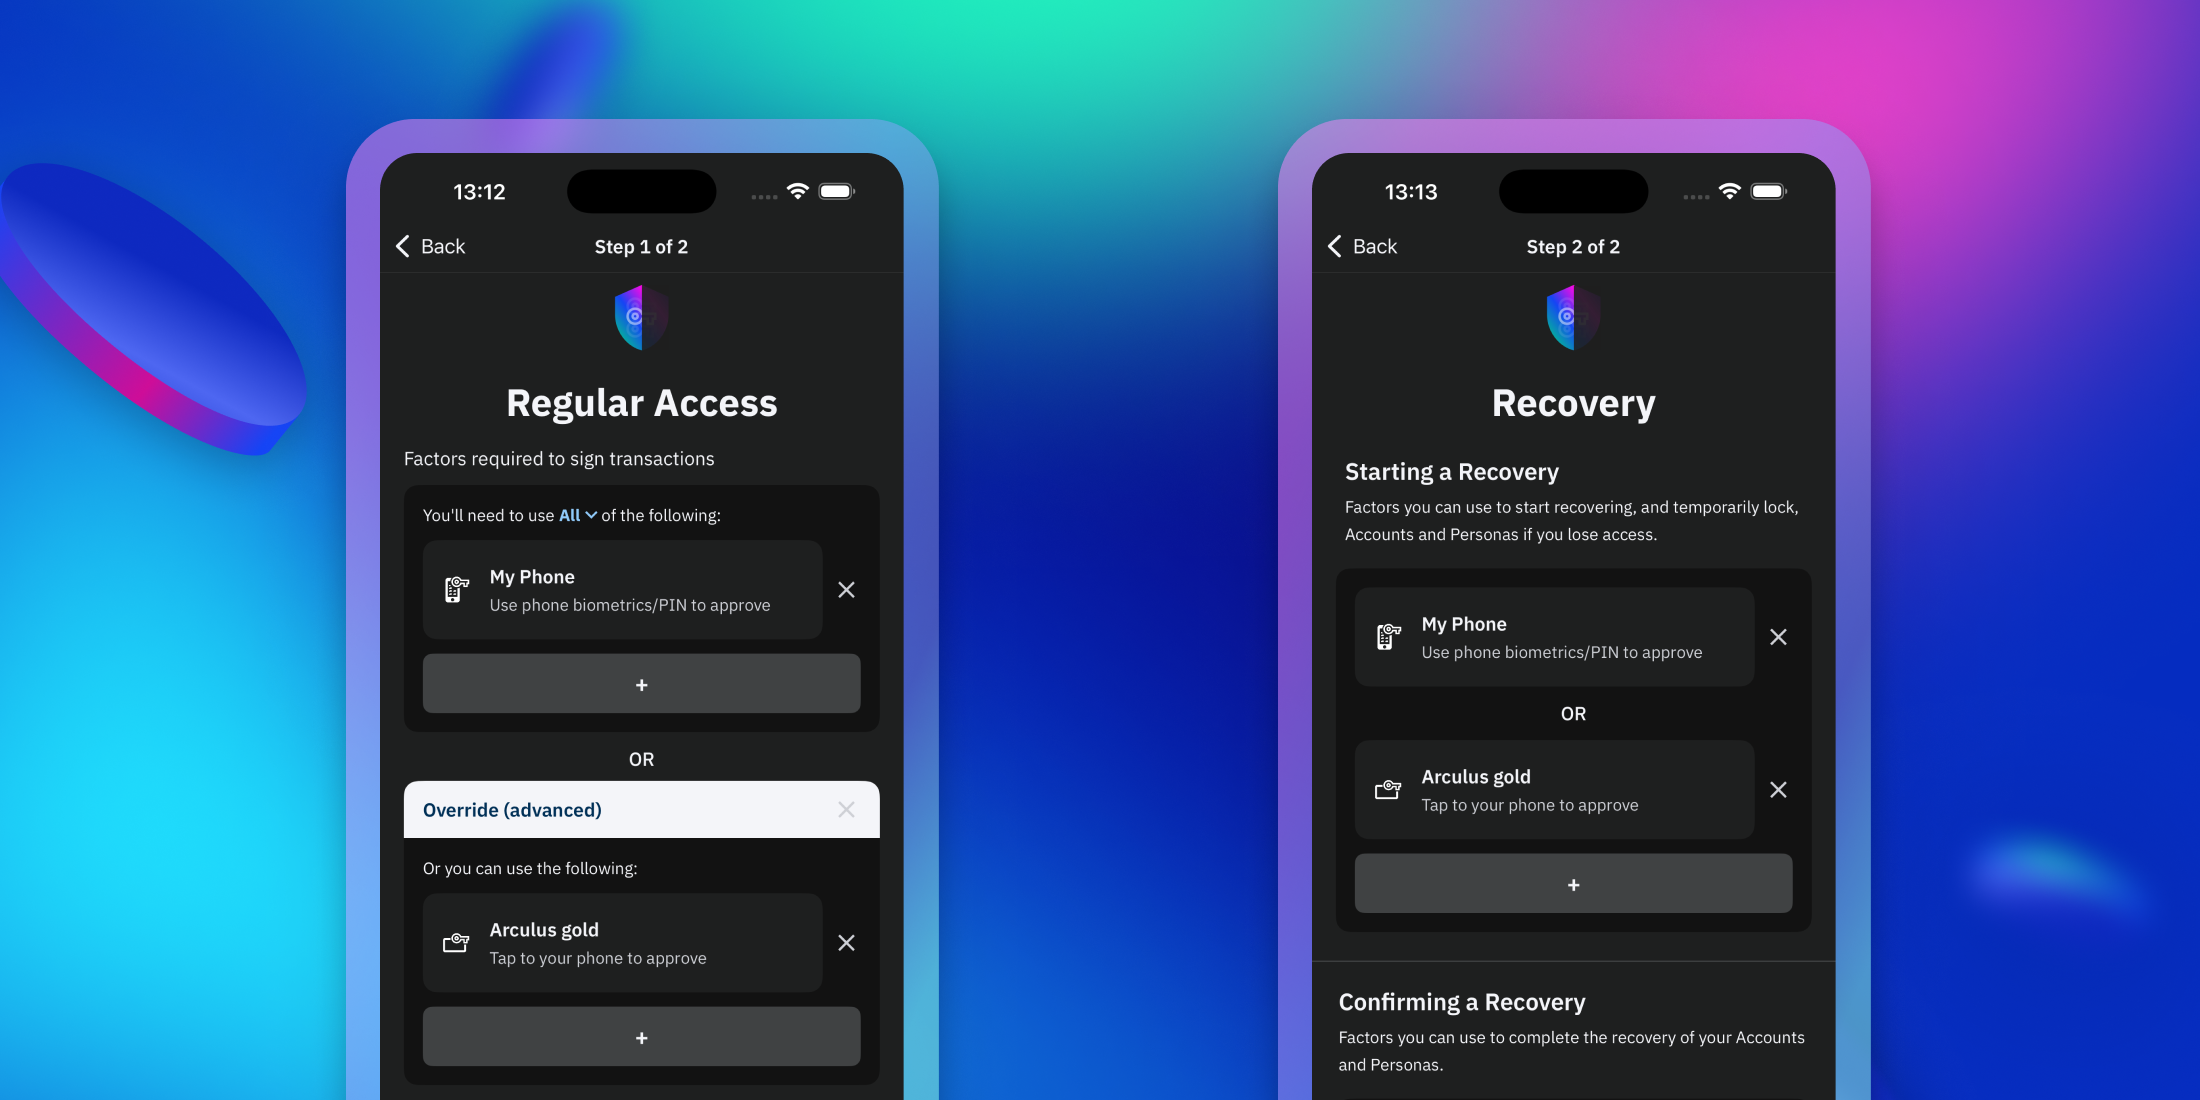
- You set up 1 or more factors (your phone biometrics/PIN, a hardware device, or an additional recovery method).
- By default, Regular Access requires all factors to sign. However, you can choose which factors, and how many, are required to sign a transaction.
When to Use the Override Option
An override is like a backup door you prepared ahead of time.
Example: Losing Your Phone
If you configured the Regular Access in your Shield to require two factors when signing a transaction, in example:
- Factor 1: Your Phone (biometric / PIN)
- Factor 2: A hardware device (Ledger Nano)
If you lose your phone:
- Transactions can’t be signed with the regular factors anymore (since one is missing).
- But you set up the Arculus Card as an override option when you built your Shield, so that option can be used instead.
That way, even if your phone is lost or broken, you can still securely access your account without being locked out.
Setting Up Your Security Shield in Radix Wallet
Before you start:
Make sure your wallet is connected to Stokenet (the Radix public test network).
Step 1. Begin Setup
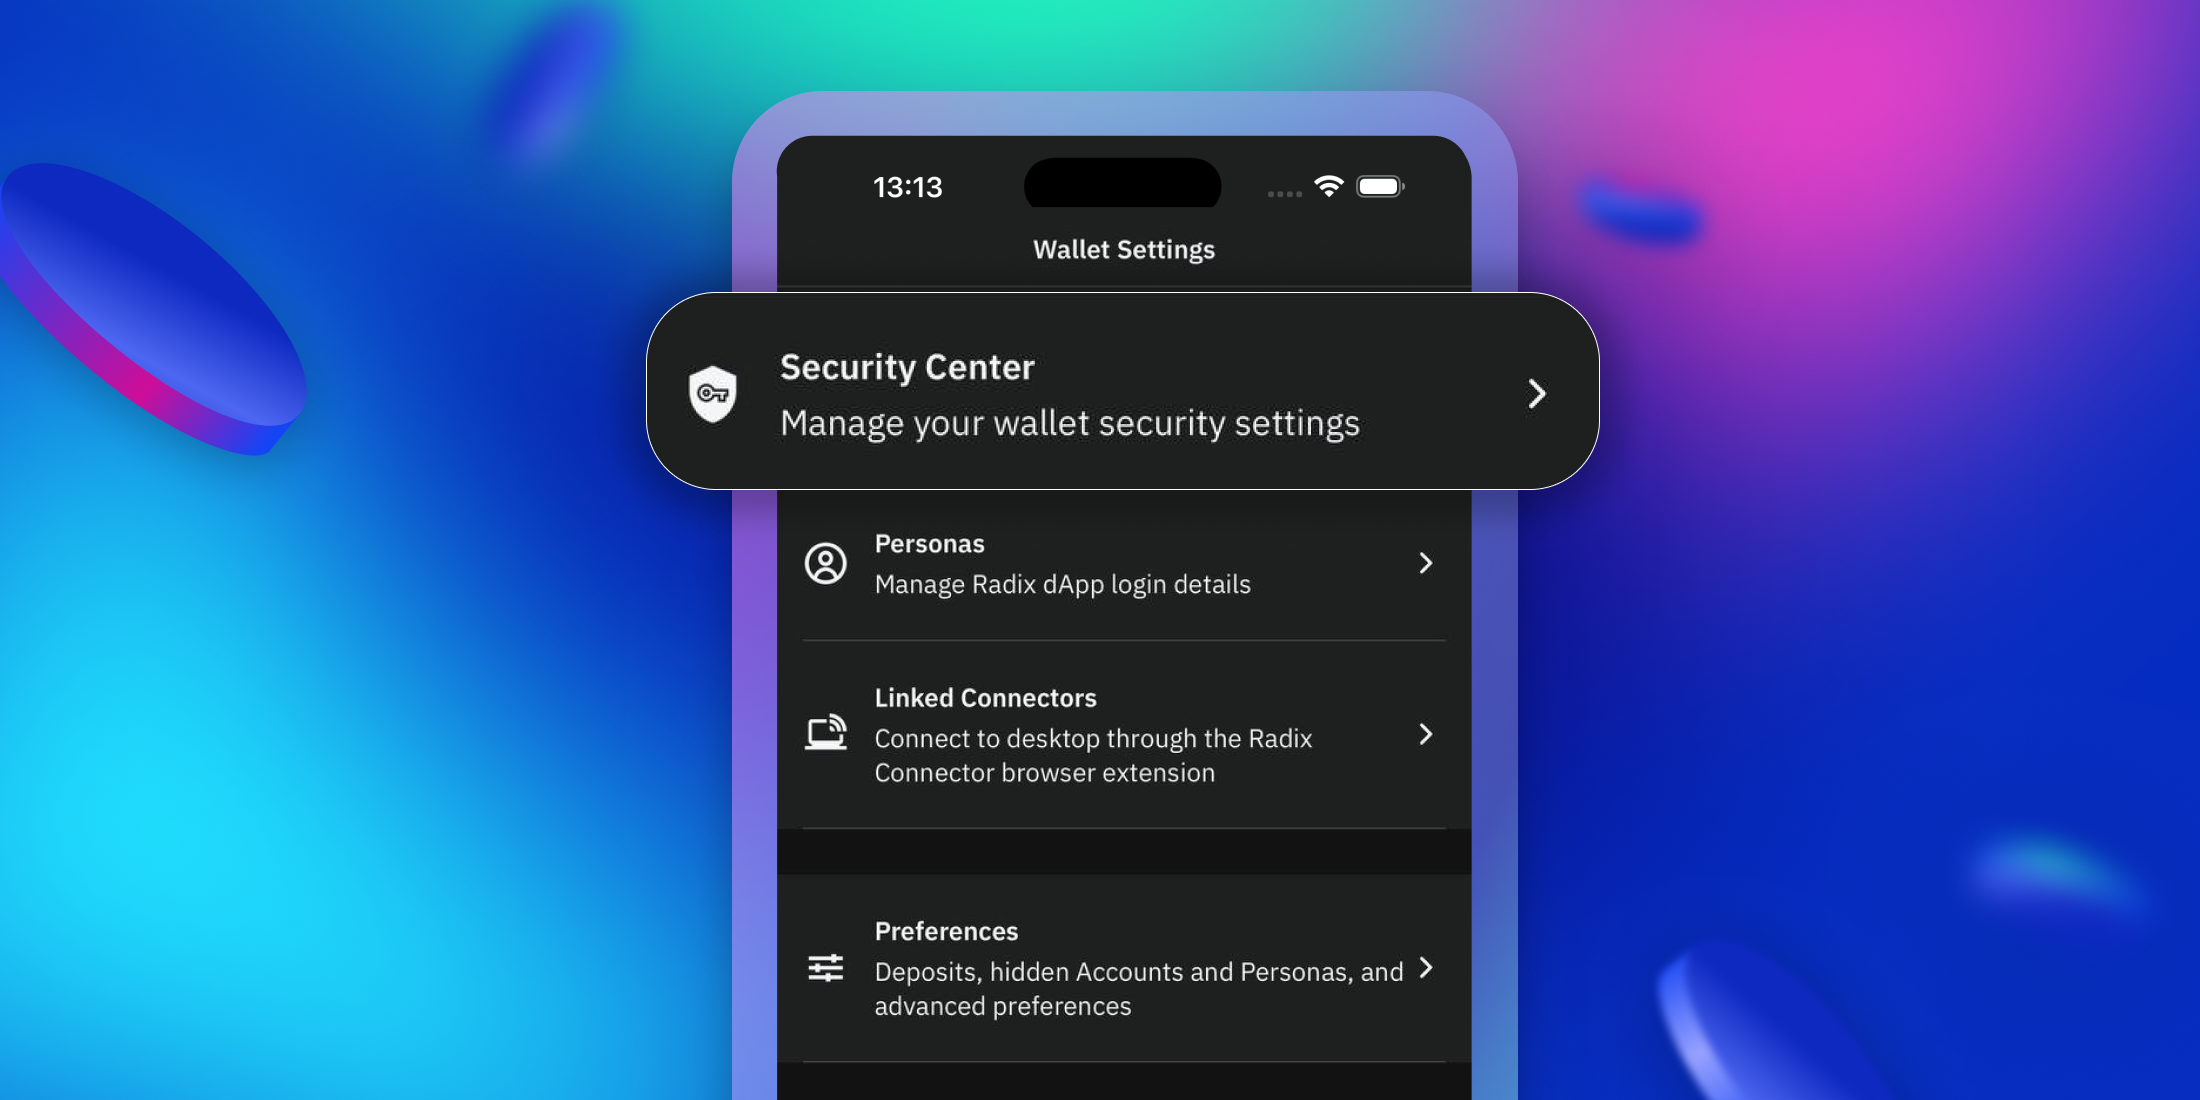
- Tap the Settings icon on your home screen.
- Go to Security Center → Security Shields.
- Tap Create Shield to start.
Step 2. Select Regular Access Factors
Choose which factors you’ll use for everyday approvals.
- Options include:
- Phone (biometric / PIN)
- Arculus Card
- Ledger Nano
- Off Device Mnemonic
If you already have these set up, the wallet will suggest a default shield for you.

Step 3. Add Hardware Device (if selected)
- Pick your hardware device (e.g., Arculus Card or Ledger Nano) and connect it.
- Tap Add Hardware Device or skip advanced setup if you’d rather continue without.

Step 4. Configure Regular Access & Recovery
- Your Regular Access factors will be shown. Keep in mind the default Regular Access rule requires all factors to sign, but you can edit this to only require some of them.
- Choose factors and rules to set Recovery to finish setting up your Shield.
Note: using Recovery will be enabled in Phase 2 of the rollout.
Step 5. Name Your Shield
Give your new Security Shield a clear name, this will help you recognize it later.

Step 6. Apply Your Shield
- Choose an account or persona to apply the Shield to.
- Review factors and confirm.
- A signing flow will begin to finalize setup, so the Shield becomes active on the Radix network.
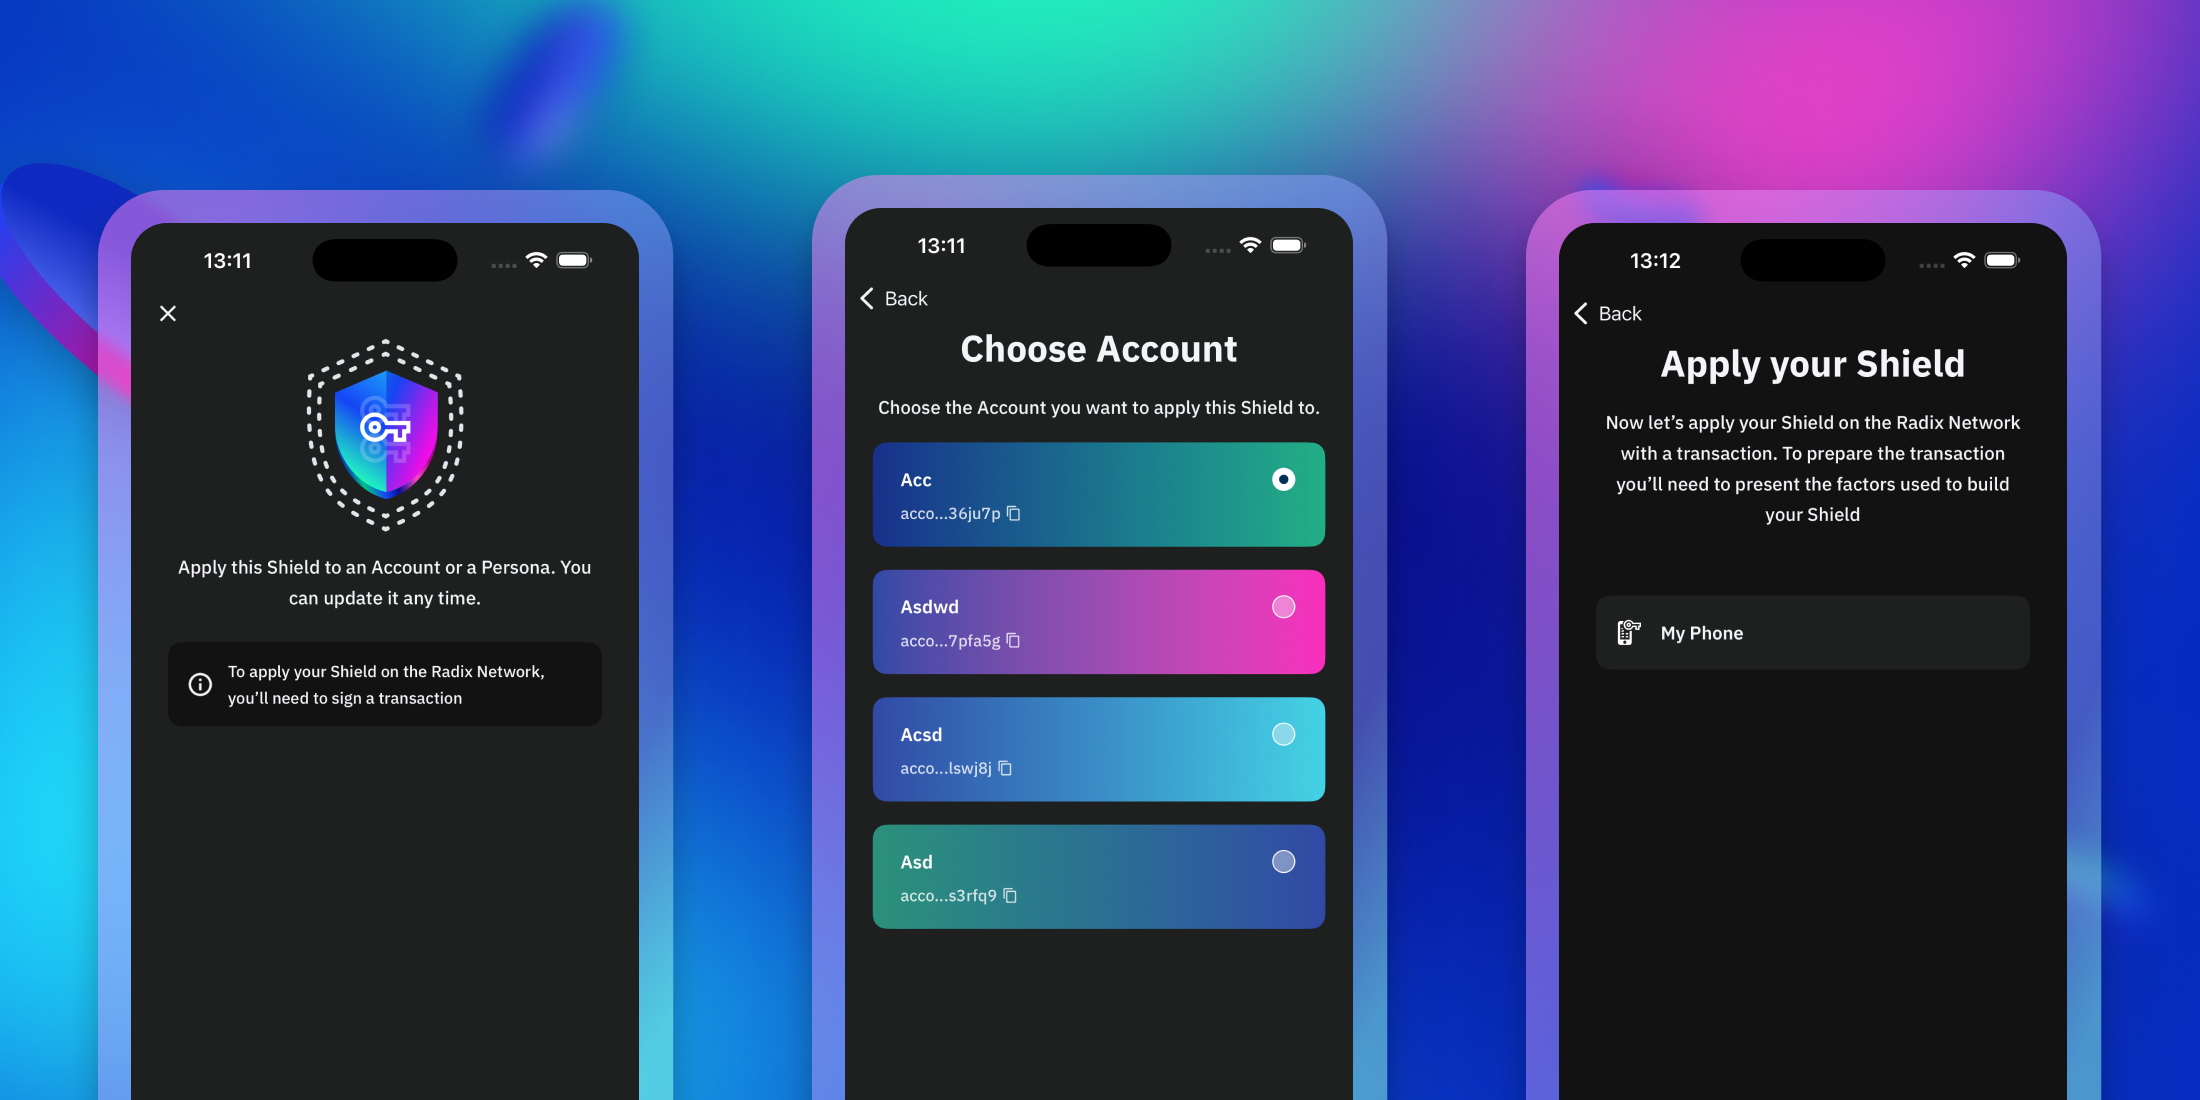
Step 7. Review & Confirm Transaction
- You’ll see a “Review Your Transaction” screen.
- Double-check your chosen factors (e.g., Phone + Arculus).
- Approve the transaction.